
In this guide, we will walk through how to import worker data from Rippling into Assets. We will cover authentication, the Get Workers API, field mapping, and setting up scheduled imports.
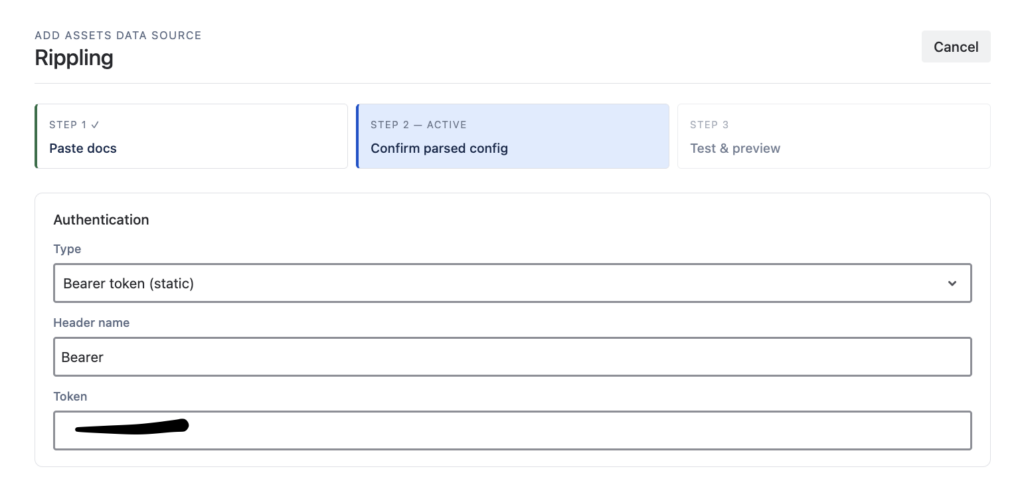
Rippling’s REST API uses bearer token authentication. Every request must include the header:
Authorization: Bearer <YOUR_API_TOKEN>To generate a token, follow the steps in Rippling’s API Tokens documentation:
Use the token generated above in the OnLink connection.
This is the part people most often get wrong, so let’s highlight it. Rippling scopes follow the {resource_name}.{read|write} convention, and two rules apply:
For this integration, enable read access to worker data:
| Scope | Why it’s needed |
|---|---|
workers.read | Required to call the |
users.read | (Optional) If you expand or look up the associated user record |
departments.read | (Optional) If you expand department details instead of just IDs |
teams.read | (Optional) If you expand team details instead of just IDs |
employment-types.read | (Optional) If you expand employment type details |
If your API calls return a
403, check both the token’s scopes and the permission profile of the user who created the token.Make sure you have read access to only the objects you want to import to Assets.
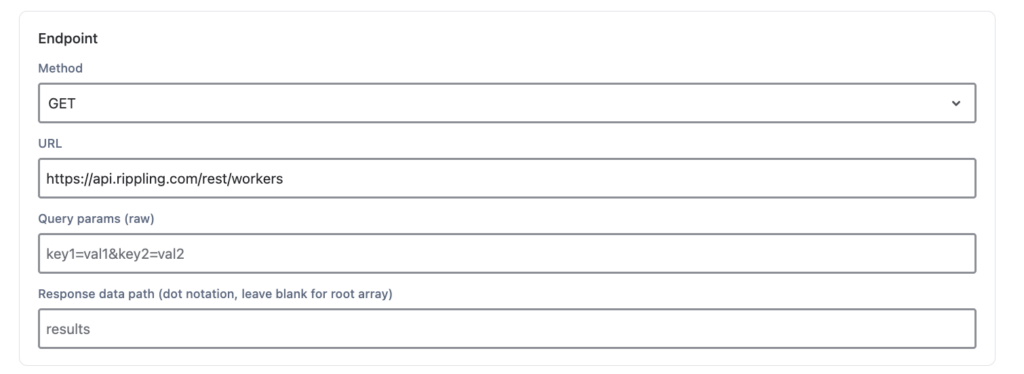
Worker data comes from the List Workers endpoint:
GET https://rest.ripplingapis.com/workersA worker represents a person’s HR worker profile (employment/engagement) in your company. A quick test with curl:
curl --request GET \
  --url "https://rest.ripplingapis.com/workers" \
  --header "Authorization: Bearer <YOUR_API_TOKEN>"
Configuring in OnLink
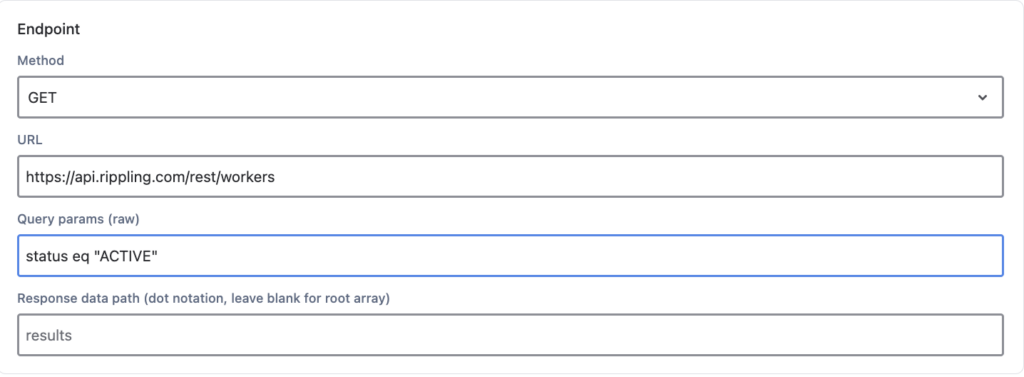
You can refine results using the filter query parameter. Filterable fields include status, work_email, user_id, created_at, and updated_at. For example, to import only active workers:
GET /workers?filter=status eq "ACTIVE"Filtering at the source keeps terminated workers (or test records) out of your Assets schema entirely — a much cleaner approach than importing everything and cleaning up afterward.
The endpoint returns a paginated list using cursor-based pagination:
limit parameter to control page size.next_link / cursor for the next page; keep following it until it returns null.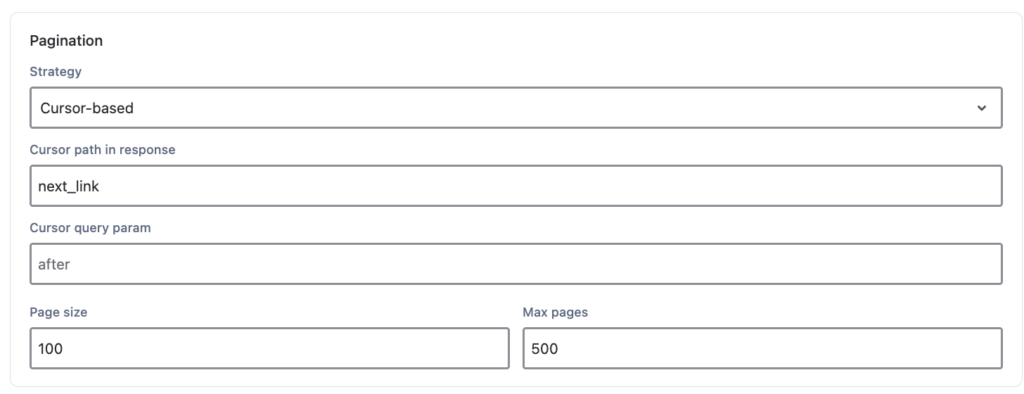
Before mapping, make sure your Assets schema is ready:
Tip: Create your Worker object type and its attributes in Assets first. The attribute names on the right side of the mapping must match your Assets attribute names exactly.
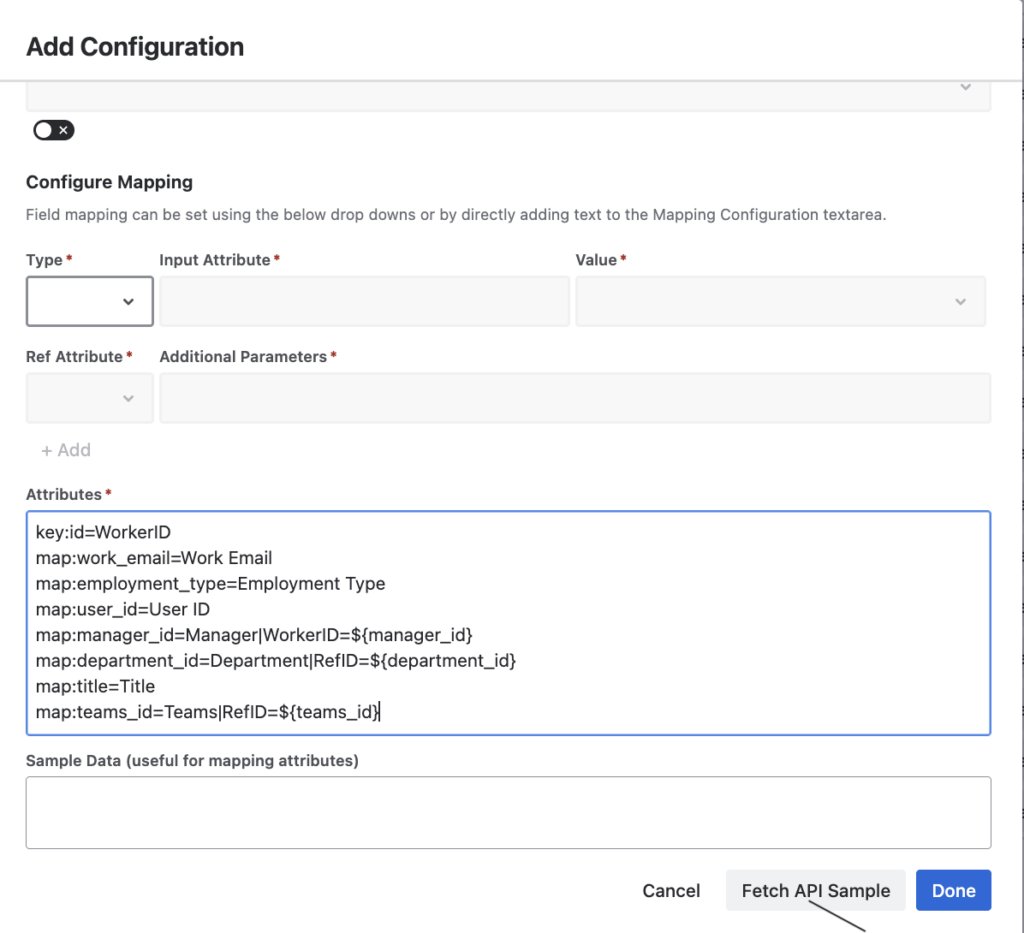
Here is a sample OnLink mapping for the Rippling worker fields:
key:id=WorkerID
map:work_email=Work Email
map:employment_type=Employment Type
map:user_id=User ID
map:manager_id=Manager|WorkerID=${manager_id}
map:department_id=Department|RefID=${department_id}
map:title=Title
map:teams_id=Teams|RefID=${teams_id}| Line | Description |
|---|---|
key:id=WorkerID | The key prefix defines the unique identifier. Rippling’s worker id maps to the WorkerID attribute in Assets, so future syncs update existing objects instead of creating duplicates. |
map:work_email=Work Email | The map prefix connects a source field to an Assets attribute. Syntax: map:[Rippling_Field]=[Assets_Attribute]. |
map:title=Title | Simple text mapping for the worker’s job title. |
map:employment_type=Employment Type | Captures whether the worker is a full-time employee, part-time, or contractor — useful for access policies and automations. |
map:manager_id=Manager|WorkerID=${manager_id} | Reference mapping. Everything after the pipe is an AQL lookup: Manager is an Assets attribute that points to another Worker object, and ${manager_id} is matched against that object’s WorkerID. This builds the org hierarchy inside Assets. |
map:department_id=Department|RefID=${department_id} | Same pattern for departments — links the worker to a Department object whose RefID matches. If the referenced object doesn’t exist, OnLink can create it (config:enable_object_creation=true), or you can suppress that with |create=false. |
map:teams_id=Teams|RefID=${teams_id} | teams_id is an array — a worker can belong to multiple teams. OnLink maps each element to a referenced Team object, giving the attribute cardinality > 1 in Assets. |
Before running a full import, use the Fetch Sample button in the OnLink configuration screen. This calls the Rippling API with your token and returns one raw JSON worker record — which does three things for you:
A sample worker record looks like this:
{
  "id": "worker_8f2b1c",
  "user_id": "user_3d9a7e",
  "work_email": "alex.rivera@acme.com",
  "title": "Senior Platform Engineer",
  "employment_type": "FULL_TIME",
  "manager_id": "worker_5c4e2a",
  "department_id": "dept_1a2b3c",
  "teams_id": ["team_9x8y7z", "team_4q5r6s"],
  "status": "ACTIVE",
  "start_date": "2023-04-17",
  "created_at": "2023-04-10T08:15:30Z",
  "updated_at": "2026-06-30T12:01:44Z"
}
OnLink processes data in two steps Get Data and Import Data:
key field.The worker id from Rippling. Map it with key:id=WorkerID so OnLink updates existing objects on every sync instead of creating duplicates.
Yes. Filter on the status field so terminated workers never enter your Assets schema, or import all workers and map status to an attribute if you want visibility into offboarded workers too.
Two things to check: the token’s scopes must include workers.read, and the Rippling user who created the token must themselves have permission to view worker data — tokens inherit the creator’s permissions.
Use the pipe syntax: map:manager_id=Manager|WorkerID=${manager_id}. The AQL after the pipe tells OnLink how to look up the referenced object in your schema.
Yes. Use manual Get Data + Import runs for testing, then define a schedule for production so JSM Assets stays synchronized with Rippling automatically.
 Try OnLink on the Atlassian Marketplace today
References: