In this article, we’ll walk through how to import Azure Cloud VM resources directly into Assets with no custom coding required.
Having your Azure virtual machines represented as assets in JSM unlocks practical benefits for IT operations and service management.
Proactive vulnerability notifications. When your VMs are tracked in Assets, you can tie them into JSM workflows that alert your team to vulnerability issues. If a security advisory affects a specific OS version or VM configuration, you can quickly identify which machines are impacted and trigger incident or change management workflows.
Clear employee assignment for onboarding and offboarding. Mapping VMs to the people who use them gives your IT team visibility into which cloud resources are assigned to which employees. This is especially valuable during onboarding (ensuring new hires have the infrastructure they need from day one) and offboarding (making sure departing employees’ cloud resources are properly decommissioned or reassigned).
The Azure Cloud import in OnLink leverages the Microsoft Graph API through an Entra ID (formerly Azure AD) app registration. If you’ve already set up an Entra ID connection for other OnLink integrations, you can reuse that same connection.
Here’s how to set up the connection:
Step 1: Register an application in Azure. Go to the Azure Portal, navigate to Azure Active Directory, then App registrations, and create a new registration (e.g., “OnLink Connection”).
Step 2: Configure API permissions. Under your app registration, go to API permissions and add the Microsoft Graph permissions your integration needs. For the Azure Cloud VM import specifically, you must also grant the following permission:
Microsoft.Compute/virtualMachines/read (read/list)
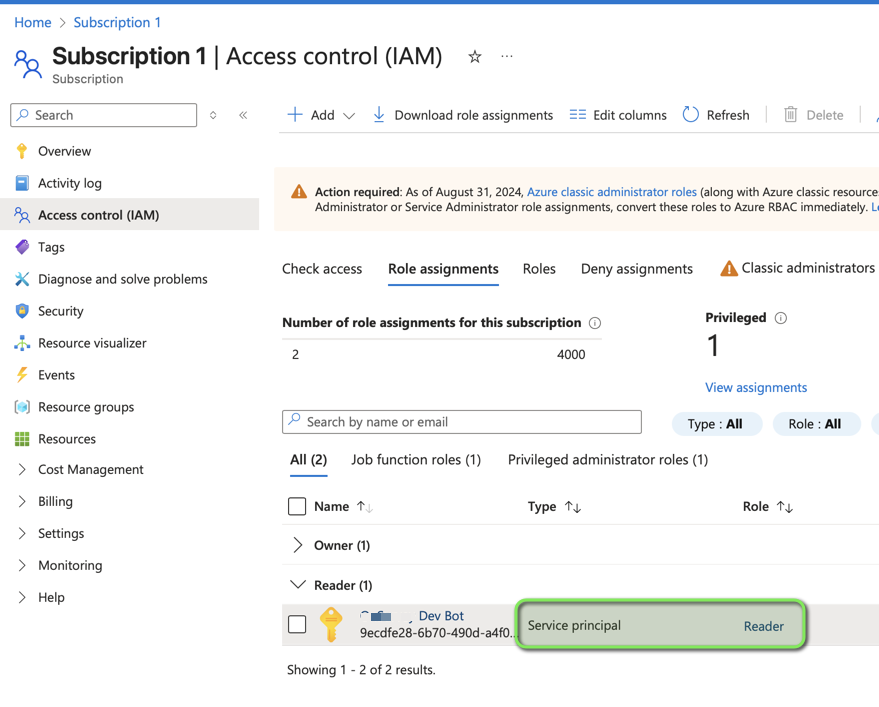
Additionally, assign the Reader role to your Azure subscription so the app can access compute resources.
Step 3: Create a client secret. Under Certificates & secrets, generate a new client secret. Copy the value immediately — you won’t be able to view it again later.
Step 4: Gather your connection details. You’ll need three values to configure the OnLink connection:
For detailed step-by-step instructions with screenshots, refer to the Entra ID connection guide in the OnLink documentation.
OnLink handles the entire import pipeline for you. There’s no need to write scripts, build middleware, or manage API pagination logic. You simply:
OnLink maps fields from the Azure Compute REST API response directly to attributes in your JSM Assets object schema. The API used is the Virtual Machines – List All endpoint, which returns detailed information about every VM in your subscription.
The Azure Virtual Machines API returns a rich set of fields. Here are the most commonly mapped ones:
| API Field | Description |
|---|---|
id | Unique Azure resource identifier for the VM |
name | The name of the virtual machine |
type | The resource type (e.g., Microsoft.Compute/virtualMachines) |
location | The Azure region where the VM is deployed |
properties.hardwareProfile.vmSize | The VM size/SKU (e.g., Standard_D2s_v3) |
properties.osProfile.computerName | The computer name set in the OS profile |
properties.storageProfile.osDisk | OS disk configuration details |
properties.networkProfile | Network interface references |
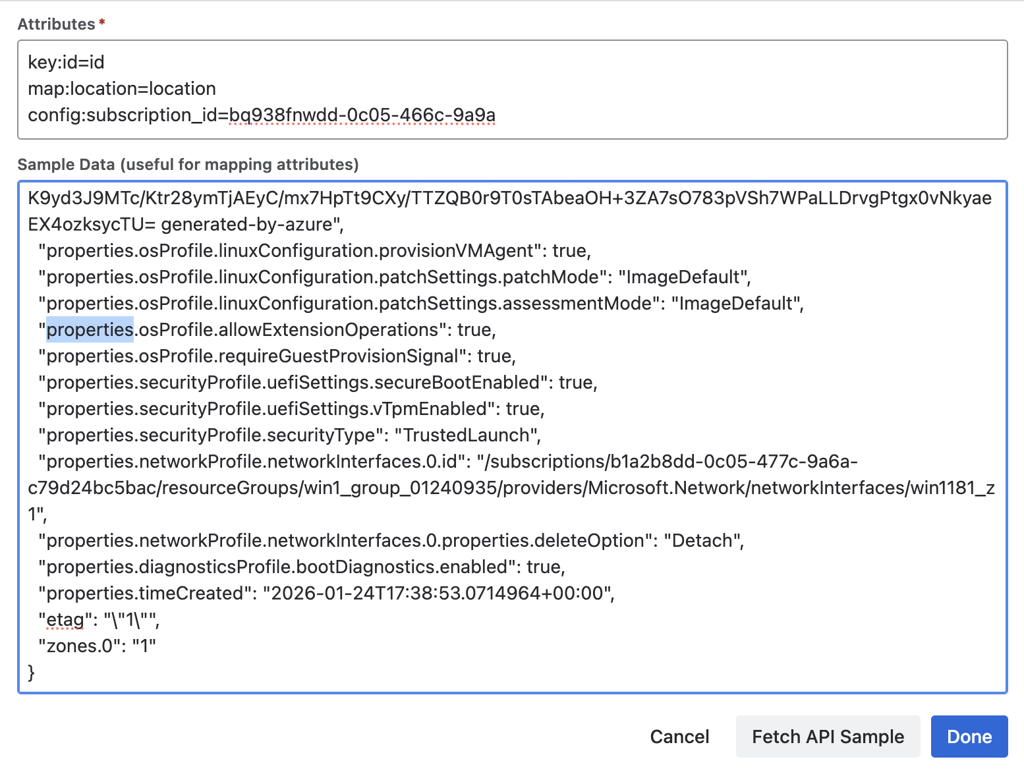
Here’s what a typical OnLink mapping configuration looks like:
key:id=id
map:name=Name
map:type=Type Name
map:location=Location
map:properties.hardwareProfile.vmSize=VMSize
map:properties.osProfile.computerName=Computer Name
config:subscription_id=<your-subscription-id>
A few things to note about the syntax:
key: designates the unique identifier field. This is what allows OnLink to update existing records rather than creating duplicates on subsequent imports. The id field (the Azure resource ID) is the recommended choice.map: maps an API response field (left side) to a JSM Assets attribute (right side). You can use dot notation to access nested properties.config: sets configuration parameters for the import (more on subscription_id below).You can also use the “Fetch API Sample” button in the OnLink UI to see the full list of available fields from a live API call, making it easy to discover and map additional properties as needed.
Q: Do I need to write any code to set this up? No. OnLink handles the entire integration — API connectivity, data retrieval, pagination, and import into JSM Assets — through its configuration UI. No scripting or middleware is required.
Q: Can I reuse my existing Entra ID connection? Yes. If you already have an Entra ID (Azure AD) app registration configured for OnLink, you can use the same connection. Just make sure the additional permission (Microsoft.Compute/virtualMachines/read) is granted and the app has Reader role access to the target subscription.
Q: What if I have multiple Azure subscriptions? You’ll need to configure a separate import for each subscription, each with its own config:subscription_id value.
Q: How often can I sync data? OnLink supports automated scheduling, so you can set imports to run at whatever interval makes sense for your organization — hourly, daily, weekly, or custom.
Q: What happens if a VM is deleted in Azure? OnLink uses the key:id mapping to match records. If a VM no longer appears in the API response, the corresponding asset in JSM won’t be automatically deleted — but it also won’t be updated. You can manage lifecycle status through separate JSM automation rules if needed.
Ready to bring your Azure VM inventory into JSM Assets? OnLink is available on the Atlassian Marketplace. Install the app, configure your Entra ID connection, and start importing.
Visit the OnLink Documentation to explore setup guides, mapping references, and more integration options.