
This post walks through importing mobile device details from Jamf Pro into Assets using OnLink.
The example uses Jamf Pro V2 API. You can configure to use V3, V4 API versions as well.
Before you start, have these ready:
https://yourserver.jamfcloud.comThen set up the connection:
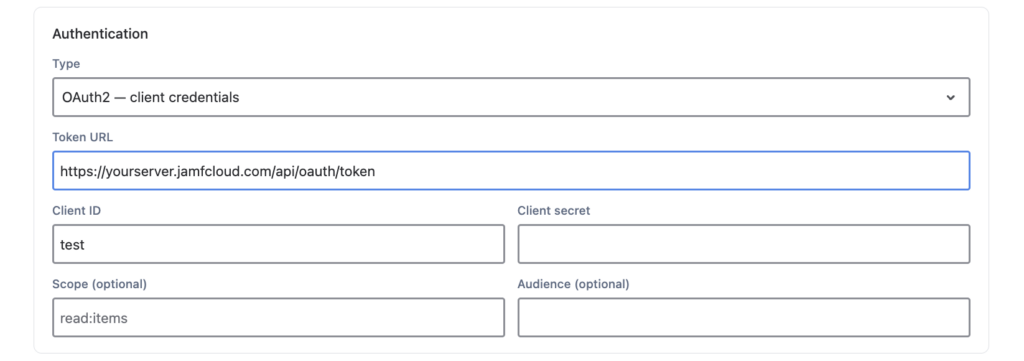
This example uses the Jamf Pro API v2 mobile devices endpoint. It’s just one example: OnLink can call any supported Jamf Pro API or Classic API method, including v3 and v4 endpoints.
In the OnLink endpoint configuration:
https://yourserver.jamfcloud.com/api/v2/mobile-devicessection=GENERAL§ion=HARDWARE. The Jamf API reference lists every section.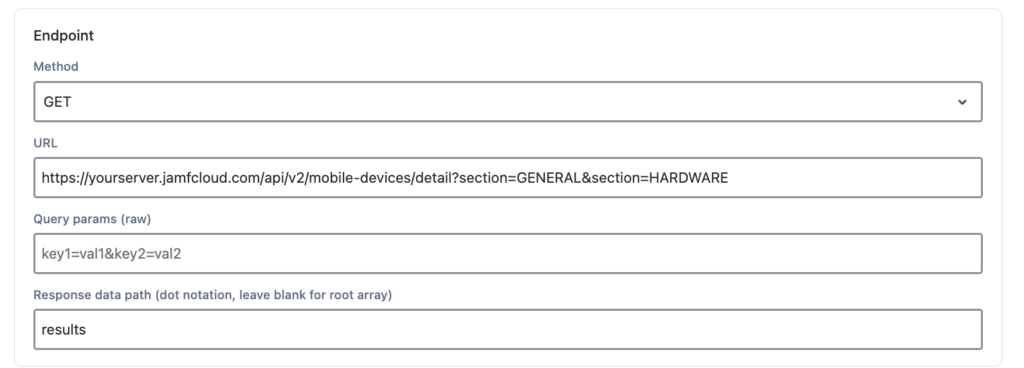
Click Fetch API Sample to preview the Jamf response. You’ll use it to confirm field paths in the next step.
Mapping rules tell OnLink which Jamf field fills which Assets attribute. Two keywords do the work:
key sets the unique ID OnLink uses to match and update existing Assets objects.map links a Jamf field path to an Assets attribute. Nested fields use dot notation, like general.osVersion.Here’s a starter mapping for mobile devices:
Start with a few fields, check each path against the API sample, then add more. Serial number, model, assigned user and security status are all in the response when you need them.
To run it, click Get Data, wait for Job Logs to show No more pending records, then click Import. Add a schedule and Assets stays in sync with Jamf Pro on its own.
No scripts to write or maintain. OnLink connects Jamf Pro, and 100+ other HR, identity and device sources, to JSM Assets in one app.
Try OnLink free on the Atlassian Marketplace and import your first Jamf Pro devices today. The full setup guide has the sample response and troubleshooting tips.
Yes. Mobile devices are just the example. Swap in any supported Jamf Pro API or Classic API endpoint, then update the mapping to match that response.
Read access only. Create a Jamf API role and client that can read the data you want to import, and give OnLink its client ID and secret.
No. OnLink uses the key field to match existing Assets objects and update them. Pick a field that is unique and always returned by the API.
Set a schedule in OnLink. It runs Get Data and Import automatically, so Assets reflects Jamf without manual runs.
Compare your mapping path with the Fetch API Sample response; nested fields need dot notation, like general.osVersion. If nothing imports at all, check the endpoint URL and the API client’s permissions.