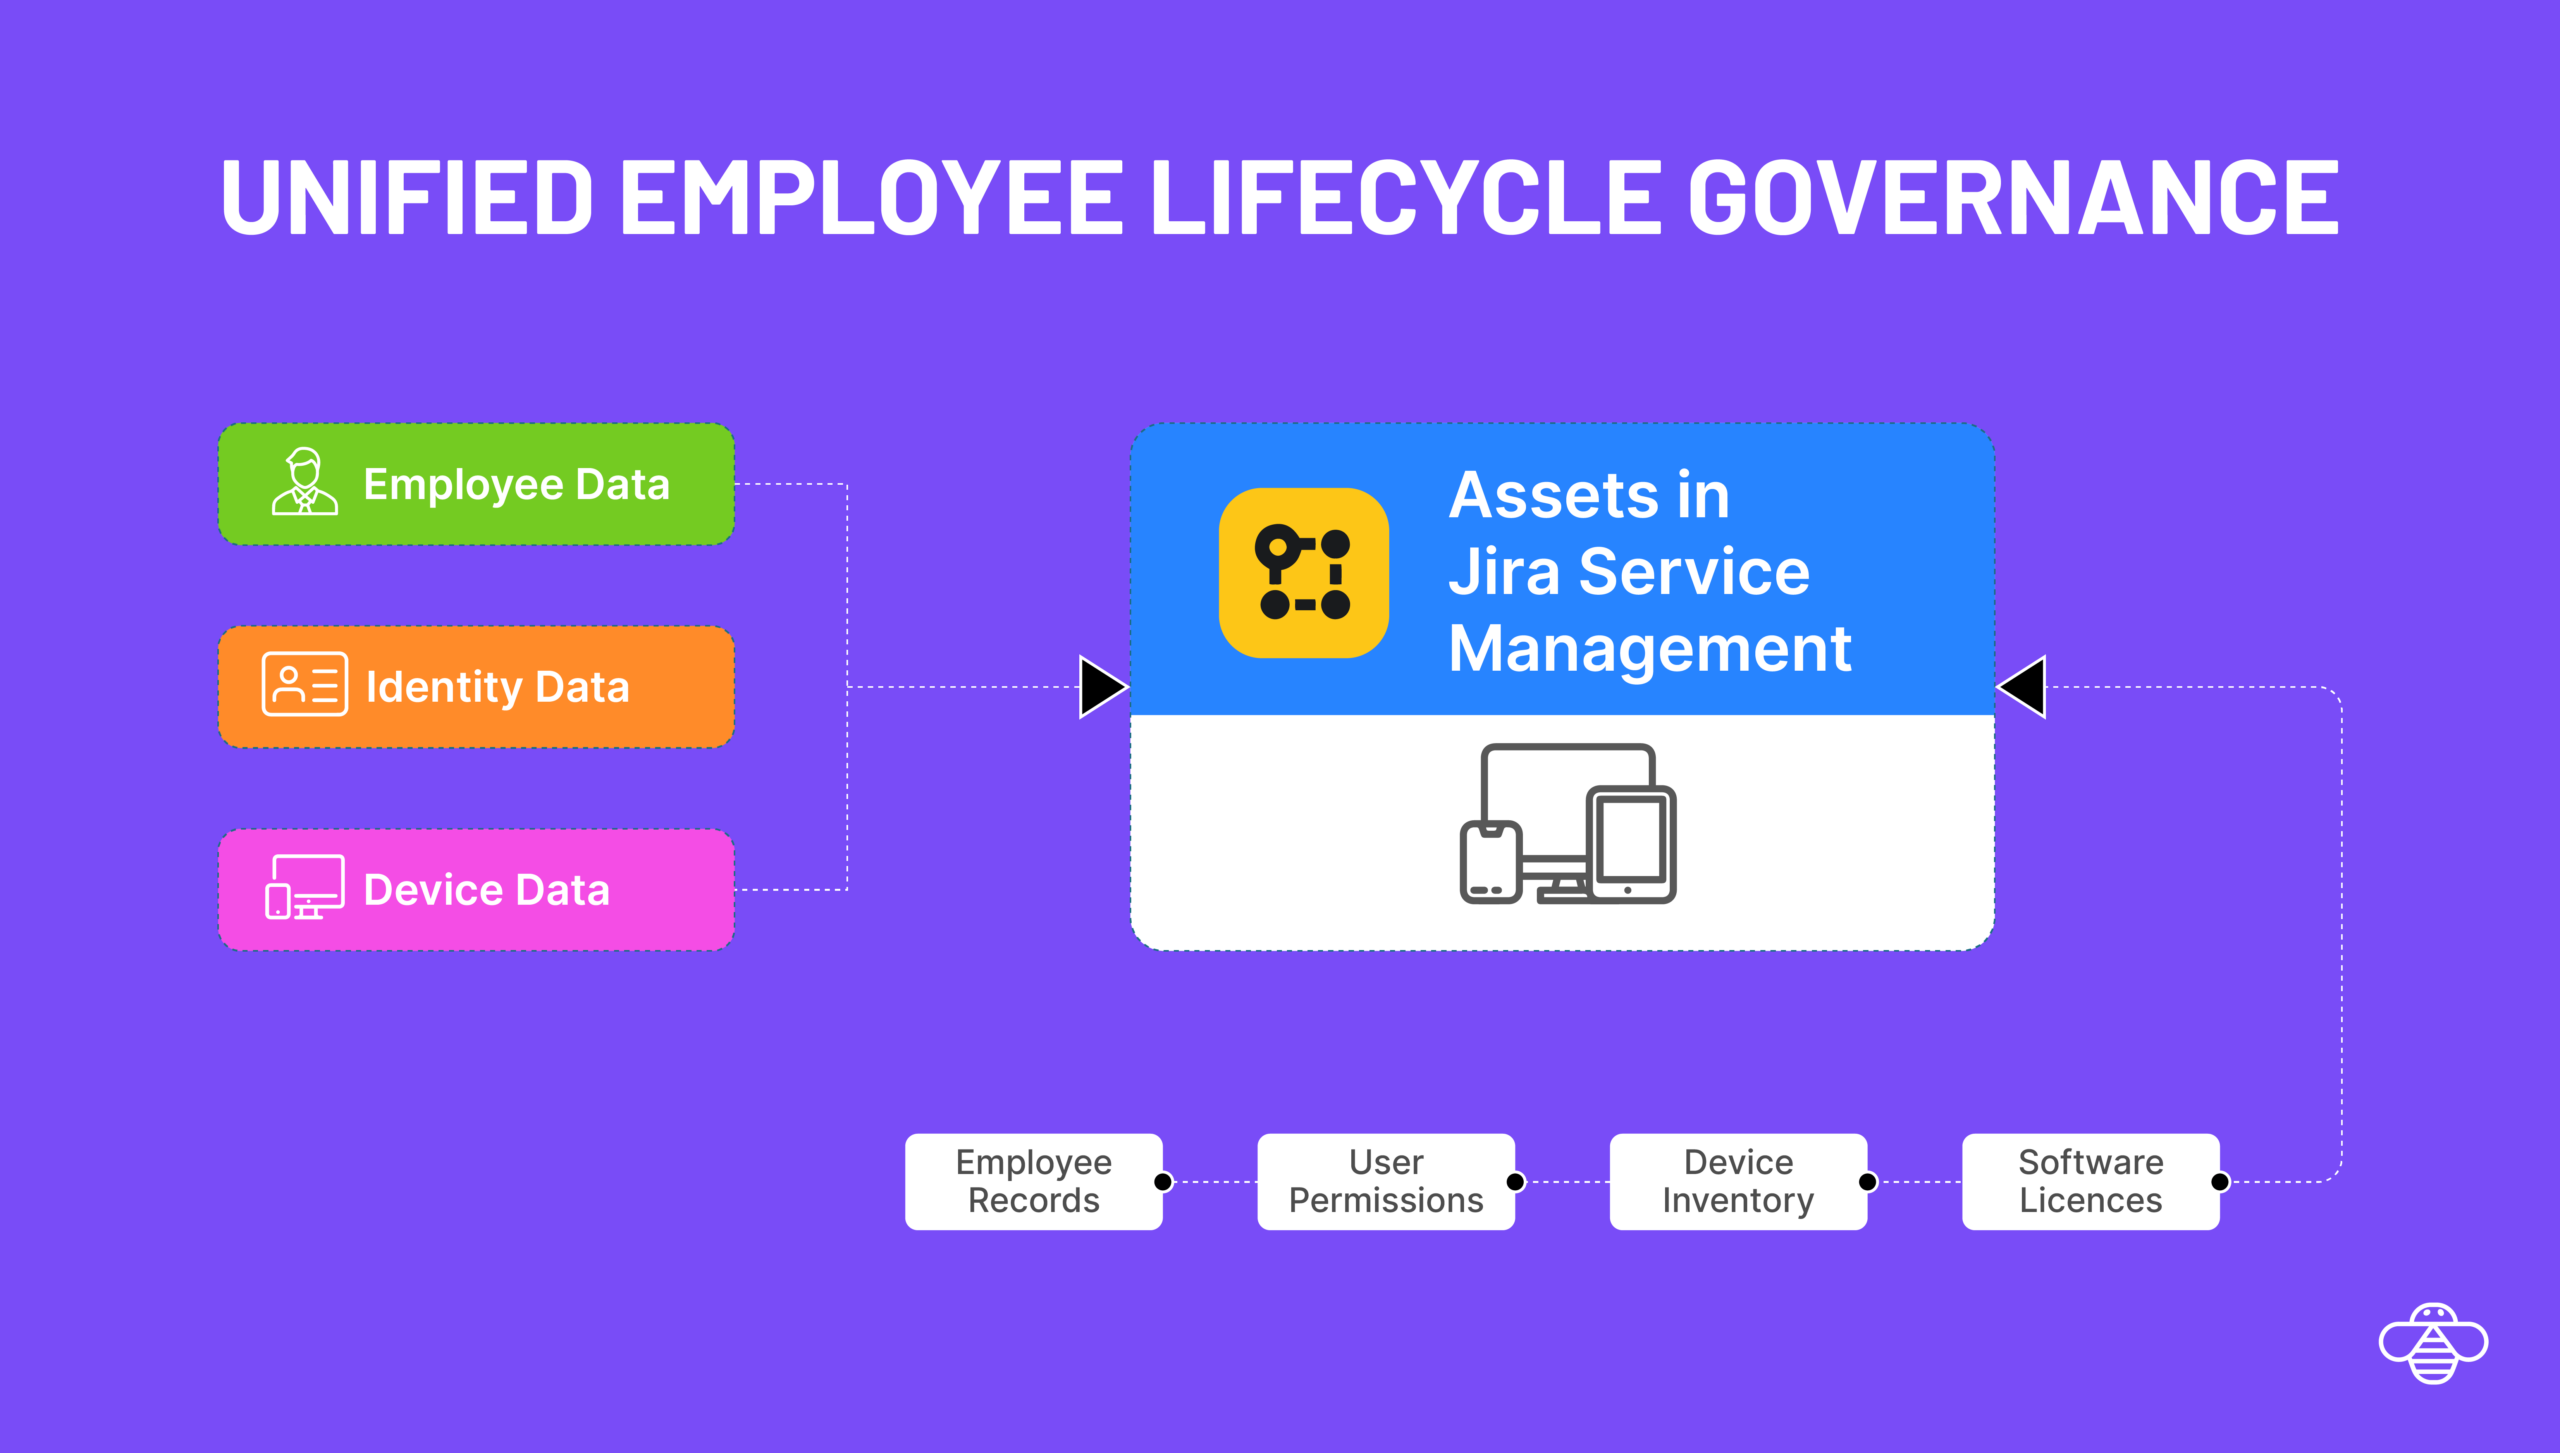
Managing user governance requests and employee change requests are a significant workload for IT teams. Inorder to have an efficient IT Service Management (ITSM) in Jira Service Management (JSM), having the user identity data, roles, groups, licenses and entitlement in asset objects makes it easy for automations.
In this guide, we will walk through how to easily import users and other objects from JumpCloud into Assets.
Here is why you should import JumpCloud data into Assets:
Enriched Ticket Context: When a user raises a ticket, the agent can immediately see the user’s department, location, and job title without switching tabs.
Automated Approvals: By mapping the manager field from JumpCloud to an Asset object, you can automate approval workflows in JSM based on the reporter’s actual reporting line.
Asset Assignment: You can link hardware assets (laptops, phones) directly to the synchronized User objects, creating a clear chain of custody.
Single Source of Truth: Eliminate manual data entry. When a user is updated in JumpCloud (e.g., a promotion or name change), that change automatically reflects in JSM Assets.
Using OnLink you can import JumpCloud data into Assets.
Navigate to OnLink via “Manage your apps” in Jira.
Go to the Connections tab.
Click Add System.
Select JumpCloud from the list of available integrations.
Follow the prompts to enter your API credentials.
Note: You can find details on generating your API key in the JumpCloud API Documentation.

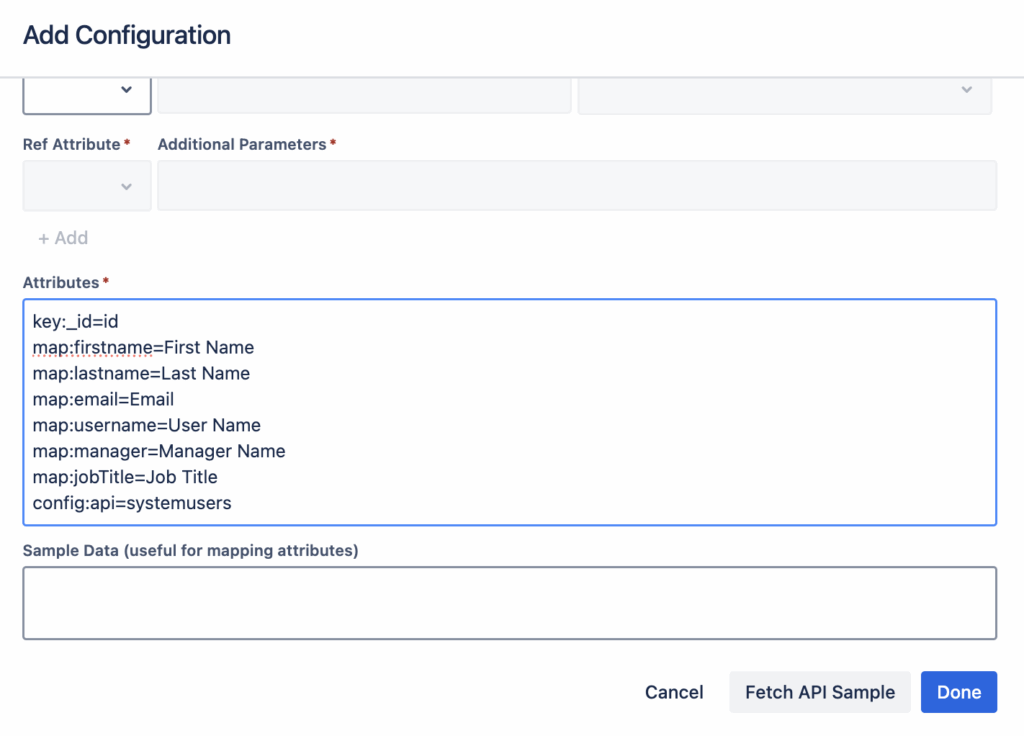
To fetch users, you will use the systemusers API endpoint. Below is a standard configuration pattern you can use to get started.
Copy/Paste Configuration:
key:_id=id
map:firstname=First Name
map:lastname=Last Name
map:email=Email
map:username=User Name
map:manager=Manager Name
map:jobTitle=Job Title
config:api=systemusers
The configuration uses specific keywords to control the data flow. Here is a breakdown:
| Key / Map | Description |
| key:_id=id | The keyword key defines the unique identifier. We map JumpCloud’s _id to the Assets id attribute. This ensures that OnLink updates existing records rather than creating duplicates during future syncs. |
| map:firstname=First Name | The keyword map connects the source to the destination. Syntax: map:[JumpCloud_Field]=[Assets_Attribute_Name]. |
| config:api=systemusers | This tells OnLink which specific JumpCloud API endpoint to query. |
| config:filter | (Optional) Used to filter the query results. The syntax follows: Example: |
JumpCloud provides a rich set of user data. You can map any field returned by the API. Documentation Link. Here is a snippet of the JSON structure available to you:
{
  "results": [
    {
      "_id": "string",
      "username": "string",
      "email": "string",
      "firstname": "string",
      "lastname": "string",
      "jobTitle": "string",
      "department": "string",
      "manager": "string",
      "location": "string",
      "phoneNumbers": [ ... ],
      "addresses": [ ... ],
      "attributes": [ ... ]
    }
  ]
}
Tip: Use the “Fetch Sample” button in OnLink to view the exact structure of your API response and identify other fields relevant to your organization.
Answer: The _id field from JumpCloud is the best unique identifier. You should map this using the key:_id=id syntax to ensure records are updated correctly over time.
Answer: Yes. You can use the config:filter parameter in your mapping configuration. For example, to only import active users or users from a specific department, you would use the syntax field:$eq:value (e.g., department:$eq:Engineering).
Answer: Inside the OnLink configuration screen, use the “Fetch Sample” feature. This will return a raw JSON response from JumpCloud, showing you all available fields (such as costCenter, employeeType, or location) that you can map to your Assets attributes.
Answer: Yes. While you can trigger manual imports for testing, OnLink allows you to define a schedule for production runs, ensuring your JSM Assets data stays synchronized with JumpCloud automatically.
Stop manually managing user lists and start leveraging the power of your JumpCloud directory inside JSM.