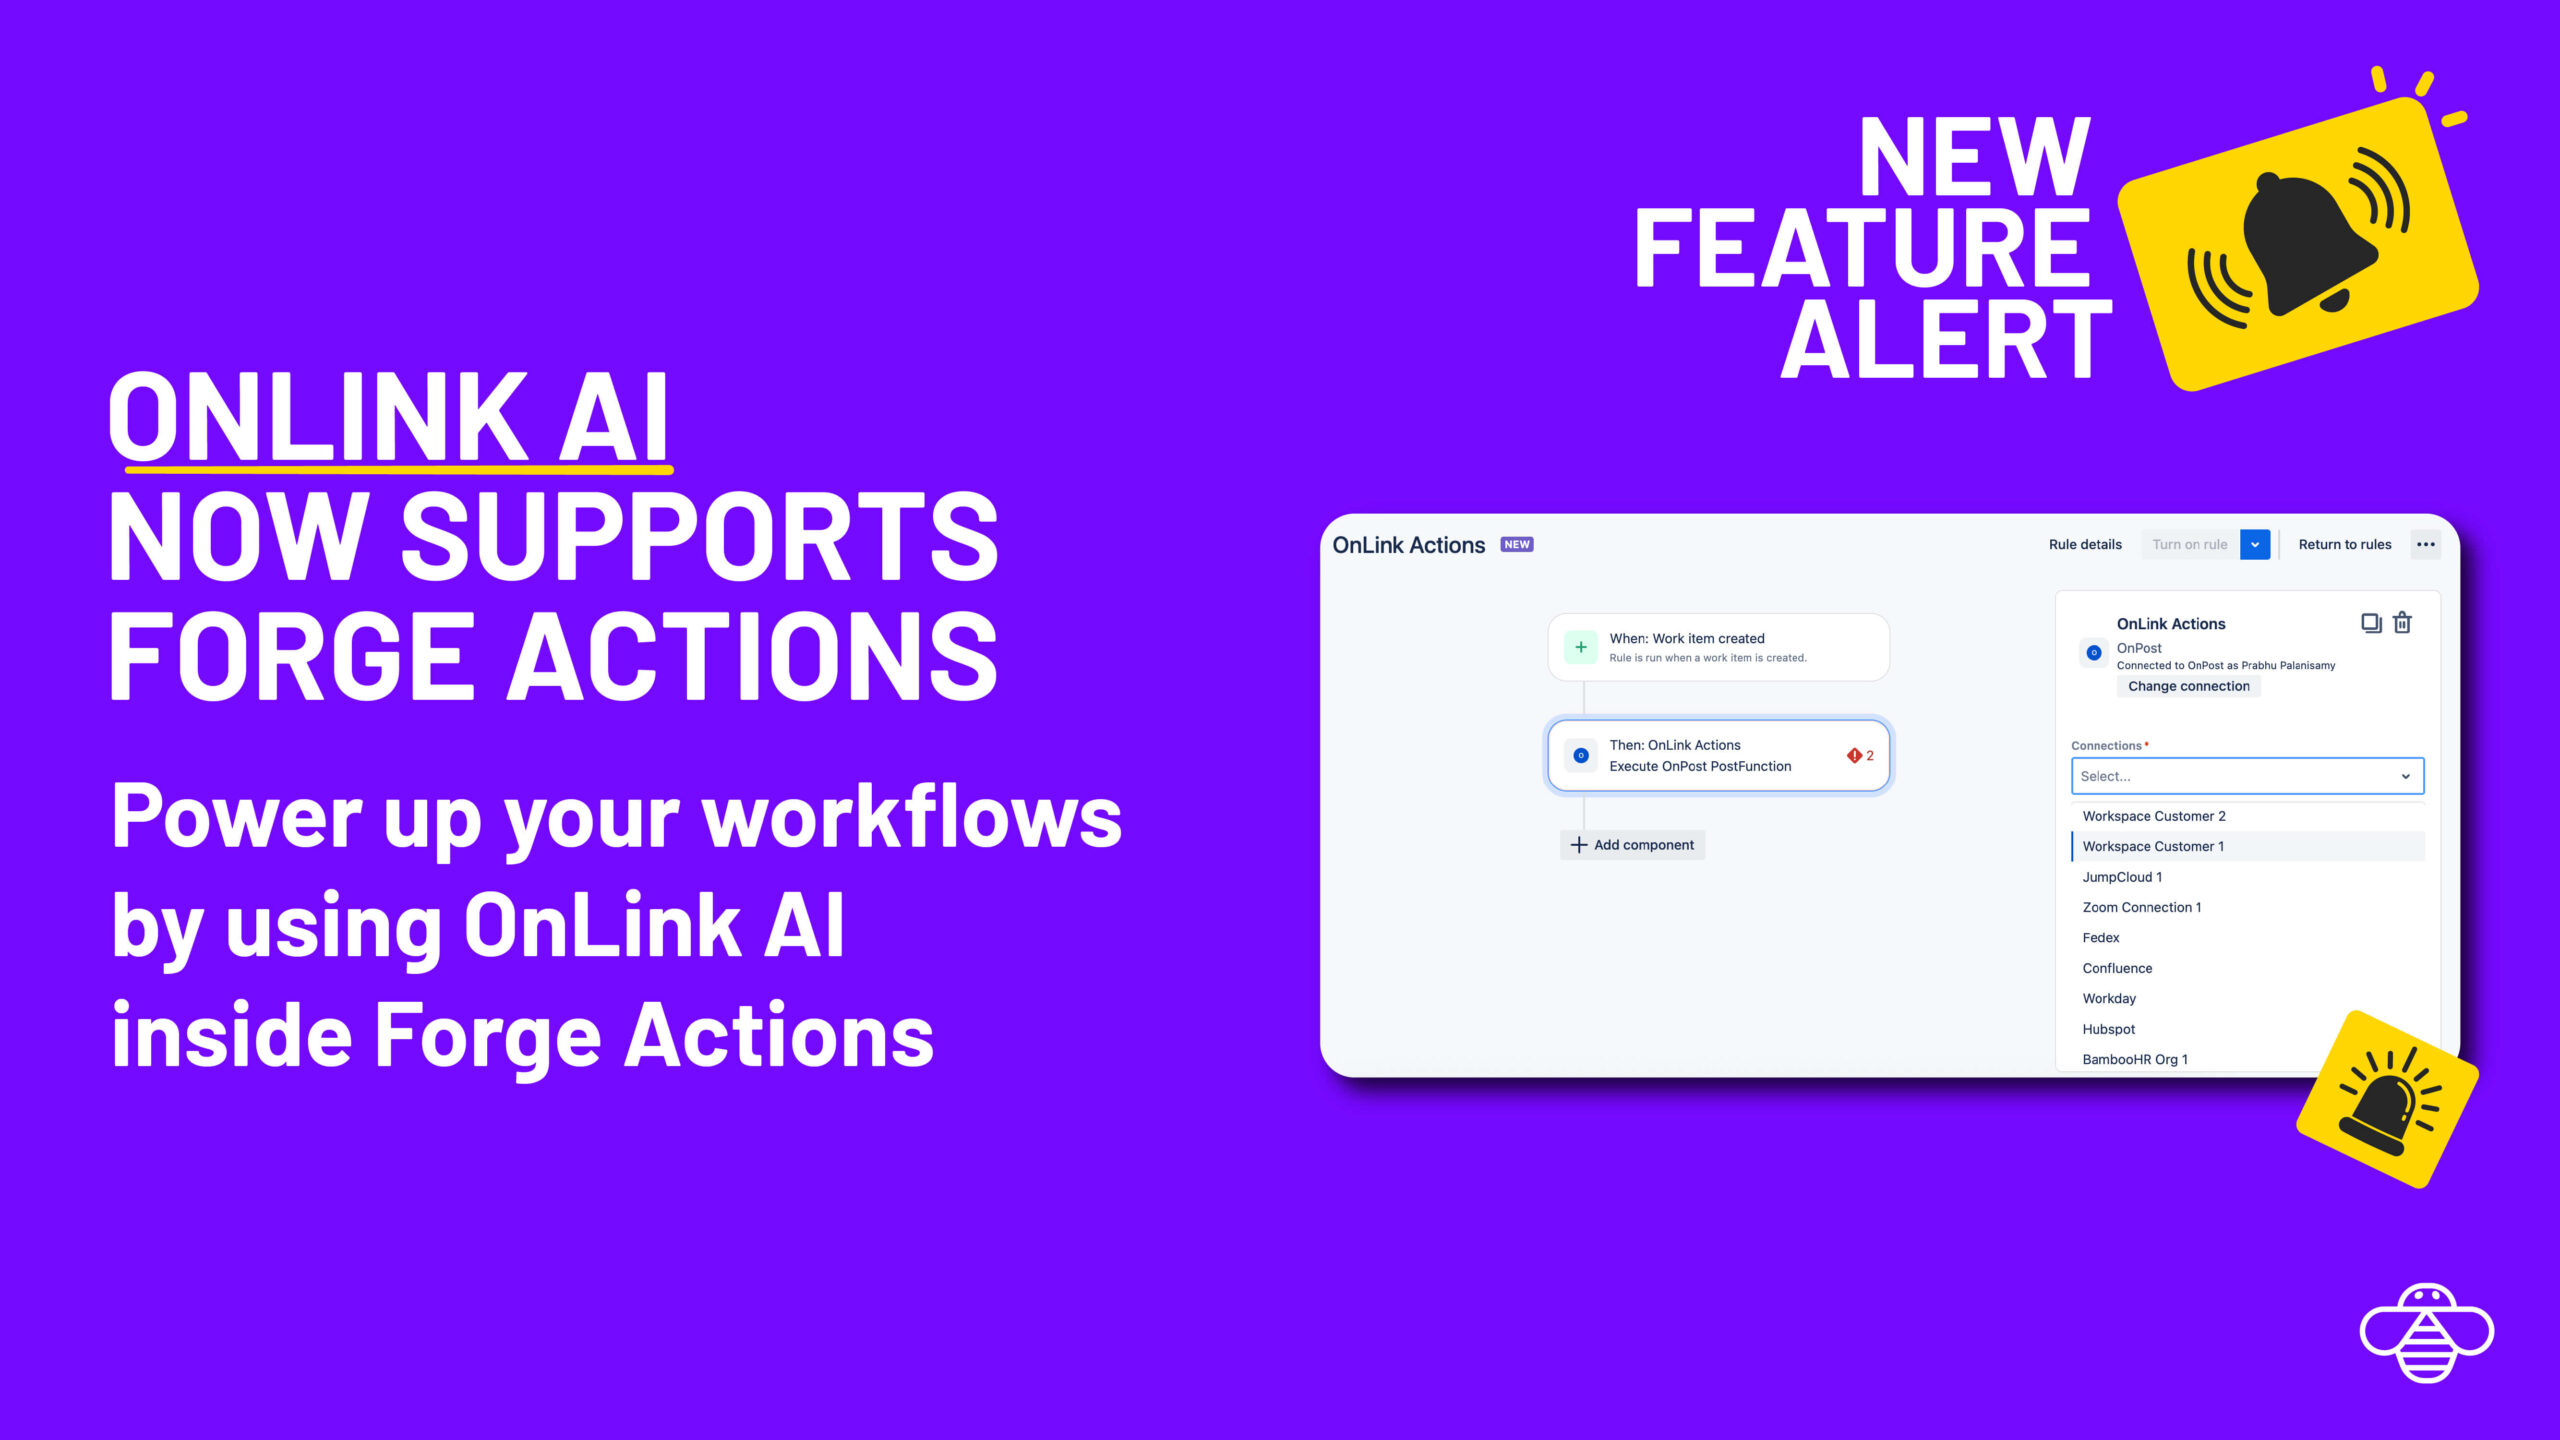
Whether you’re handling employee onboarding, access provisioning, or hardware requests, reducing manual effort means faster resolution and a better experience. With the latest support for Forge Actions, you can now supercharge your Atlassian Jira Service Management (JSM) automations by directly invoking OnLink AI methods.
Forge Actions is a newly released capability within Atlassian’s Forge platform that lets developers create custom automation actions. These actions can be added as steps in JSM automation rules and triggered by standard events like issue creation, field updates, or status transitions.
Think of it as a “plug-and-play” logic block that runs securely within Atlassian’s cloud, allowing teams to invoke external APIs, execute code, and integrate seamlessly into custom workflows.
Please note Forge’s EAP offers experimental features to selected users for testing and feedback purposes. These features are unsupported and not recommended for use in production environments.

OnLink AI is a next-generation automation toolkit built specifically for Atlassian integration use cases. It provides pre-built, API-ready methods that connect to common enterprise tools (e.g., Workday, Google Workspace, FedEx, Zoom), enabling low-code workflow automation right inside Jira.
Key highlights:
100+ methods to automate common HR, IT, and Procurement actions.
Easily connect to REST APIs without needing middleware or scripts.
Here are just a few real-world use cases that combine the power of Forge Actions with OnLink AI methods:
🔔 Trigger | ⚡ OnLink Action |
|---|---|
New hire issue created in JSM | Automatically create Zoom license and send welcome kit via FedEx |
Offboarding request moves to “Approved” | Disable user in Okta and revoke shared folder access |
Asset issue marked as “Resolved” | Update asset status in CMDB and update CDW |
Hardware replacement request is raised | Order device from vendor and create ServiceNow ticket |
Here’s how you can set up an OnLink AI-powered action using Forge:
Go to Automation: Navigate to Project Settings > Automation.
Choose a Trigger: For example, “When issue is created” or “Status is changed”.
Select Custom Action: In the “Action” step, choose Custom and then select OnLink AI.
Connect to OnLink AI: Authenticate and connect to your OnLink AI.
Choose an Endpoint: For example, Google Workspace, Zoom, FedEx, etc.
Select a Method: Such as Create user, Disable license, or Create shipping label.
Map Fields: Use smart values from Jira fields to map request data to API parameters.
Save and Test: Your automation is now live!
Power up your workflows and let us know your feedback. Give OnLink AI a try.
👉 Install OnLink AI from the Atlassian Marketplace today.
👉 Explore Atlassian’s Forge Actions to create custom automations.